SCOUT Analog Digital

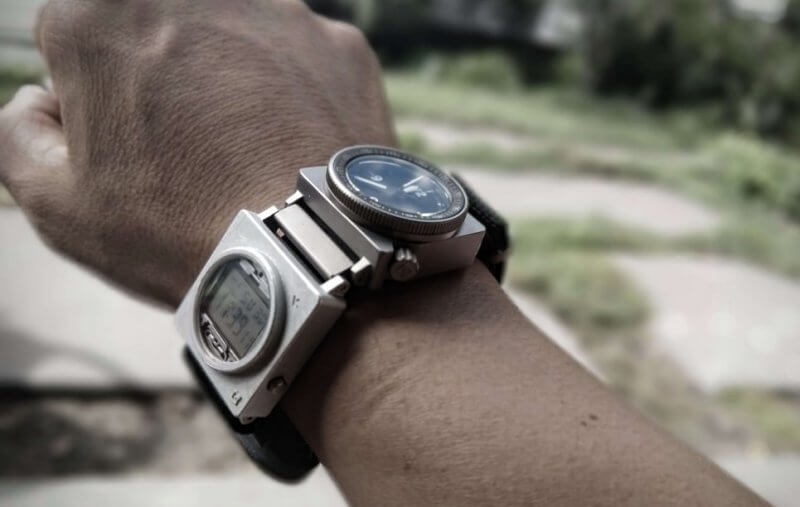
One of our new designs in the works is named SCOUT. The SCOUT design includes three modules: Analog, digital, and compass. They could be connected or used with other main watches.

The SCOUT design is inspired by the Seiko Field Master #1421-0140 (aka Contra) circa 1980.

It’s also inspired by my saddest day as a watch collector. That was the day my digital module went MIA — popped out of the Seiko Contra case during my bike ride home. Continue reading


Making noise to make some music.

Here’s a musical entry from my cabinet of curiosities.

I’m a 7 on the Enneagram. In brief: I’m always looking for adventure, afraid of being stuck, and always planning the next project.

This translates into many unfinished projects.

So, I vowed recently as we went into lockdown that I wouldn’t start any new projects until I finish my backlog. Felt like an ambitious goal, but I knew it was important for me to stop being so scattered.

Jack of all trades, master of none and all that.

One of the projects on my list for many years was a cigar box guitar. I had already commissioned a 3-string because I found a vintage cigar box I really didn’t want to mess up.

But I wanted to make one myself.

How hard could it be?

I quit smoking anything decades ago because I started racing triathlons and I always hated the aftertaste. Still, I always appreciated the designs on the boxes and labels of cigars. The rough construction, the typography, the handmade feel.

Plus, the quality boxes are made of nice cedar wood. I already had all of the parts, and just never got around to building it out.

I bought a Fuente Fuente OpusX Belicoso cigar box back in 2012. I intended to make a guitar. A six string. I even bought a guitar neck to install.

Well, eight years later all I’d done with it was stored some bonsai tools in the box.

I sat down to plan all the parts and quickly discovered that the salvaged guitar neck wouldn’t fit properly because it had just been an impulse buy, unmeasured, unplanned. At least I was able to take the tuners from it.

Project Pivot

Another thing I’ve been doing over these lockdown months is working with my son to help him learn to play ukulele. And, well, I had always wanted to learn to play as well!

I measured the box and found that it would be the perfect size for a concert ukulele.

I loved building airplane models as a kid. But I always built them raw. I never had the patience to paint the parts piece-by-piece before assembly. And I usually wanted to be finished all in one sitting. As you can imagine, I had lots of planes — in the unadorned plastic. Glue everywhere.

Decades later, I’m finally learning to plan out my projects (a bit more) and have the patience to go step-by-step.

I opted with a pre-machined neck and fretboard because although I have optimism bias, I am at least sober enough to realize I have neither the skills nor the tools for crafting a uke neck from a wood block.

Ukulele Fuente Fuente OpusX Belicoso Idea

I thought the fretboard would be already attached to the neck.

Nope.

In fact, it appeared that the neck was too wide for the fretboard by half an inch on both sides (You can see above in the photo). So, I sanded both sides down by hand as close as I could to match the fretboard’s width.

Usually, fretboards are left with a kind of tail that extends on to the body of the instrument, primarily decorative because people rarely play all the way up there (except if you’re Jake Shimabukuru). I decided to shorten the fretboard because I want the option to open the body again in the future if I want to add a piezo element pickup for amplification.

Curves Ahead

When I went to attach the neck to the body, I realized that the box edges are more curved than I realized. That meant the neck would jut off the bottom, because it had a straight edge.

So, I sanded that down to add a slight curve in the neck joint. I taped a piece of sandpaper to the curve and ran the flat side of the neck until it fit. 

I think I probably could have gotten away with gluing the neck and bridge in, but I was worried the tension from the strings might warp the neck joint. Also, the cigar box has a nice protective layer of varnish and stain on the surface, which I was worried might lessen the bond of the wood glue.

Cigar Box Ukulele Neck Curve

Too curvy

Cigar Box Ukulele Neck Attachment

I masked the areas off before applying the glue. What’s great about this cigar box is that it’s thick and sturdy.

At first, I had planned to just rely on the screw for the bridge and neck, but I was kind of paranoid that there might be too much stress, so I glued and screwed.

Ukulele Neck Sanded Area

Ukulele Bridge Sanding

Scout Donated His Purple Tape Because Scout Hates Purple And Won’t Use It


Tangent: Fuente Fuente OpusX Belicoso?

I was curious what kind of cigars came in this box.

Turns out there’s a really interesting backstory to Arturo Fuente, a family business that makes these cigars. Cigar aficionados “highly covet” these Fuente Fuente OpusX cigars because some say they’re even better than Cubans. They took a big risk over 20 years ago and are the only cigar maker in the Dominican Republic that grow a Cuban leaf used to wrap cigars

That explained why the boxes were so nice. The name of these cigars is an interesting mashup of meanings:

/end tangent.

The box held additional wood insert sidewalls. So, I didn’t need to add any reinforcements for attaching the neck, because they’re already there.

For the bridge, even though the lid is thick, I wanted to distribute the tension across the lid. I pulled out one of the wood trimmings from the sides — which wasn’t functional — and glued it to the area beneath the bridge.

Ukulele Bridge Clamping

The project required creative clamping because I don’t have any of the fancy wood clamps and don’t foresee needing those for other projects any time soon. 

Sound Hole Dilemma

I thought and sketched for a week about what I wanted to do about the sound hole. I wanted something distinctive, not just one traditional single hole. But I also had to work within my woodworking limitations. 

I worried I wouldn’t be able to make the avocado or other non-traditional shapes as well as I’d like. And maybe I’d get sick of an odd shape — or worse, ruin the box.

Ukulele Sound Hole Shapes

Sound Hole Shape Candidates

Ukulele Sound Hole Drililng

In the end, I went with a traditional circular sound hole with an added offset hole to hopefully open up the sound more. A bit of research didn’t reveal anything definitive about sound quality except tests with violin shaped holes, which I entertained for about one minute.

I borrowed a 2.5 inch bit and a 1 inch drill bit from my friend. The drill bits wobbled a bit and were not exactly straight. But I did my best to go slowly and stabilize the bits. You can see the 1 inch hole is a bit irregular.

Ukulele Sound Holes Rough

Ukulele Sound Holes, Rough

Ukulele Sound Hole Refinement

Ukulele Sound Hole, Refinement

I ended up with little piles of cedar and the cedar smells so good. It’s amazing how fragrant the wood smells even after almost a decade in my closet. I might have to make some cedar candles.

I didn’t want to add any varnish to the sound holes in case I wanted to edit them in the future. So, I used some wood oil to seal it up for now.

Cigar Box Ukulele Finished
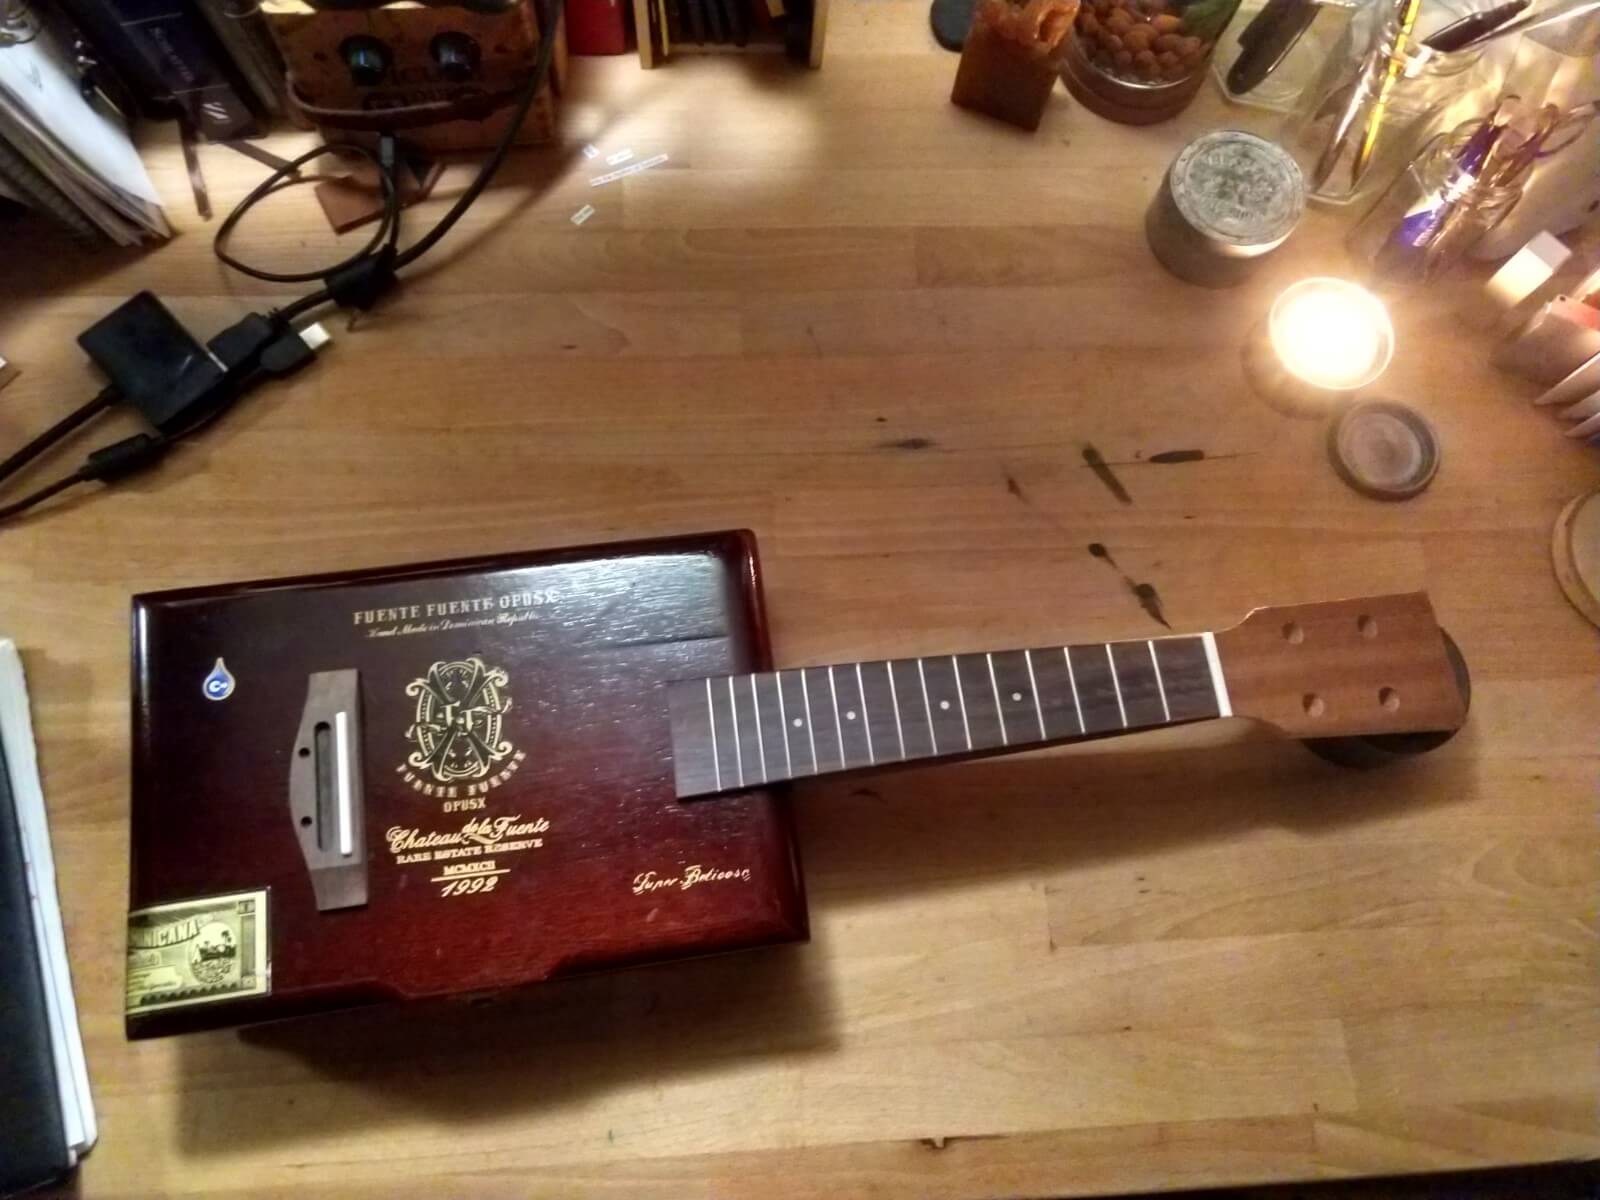
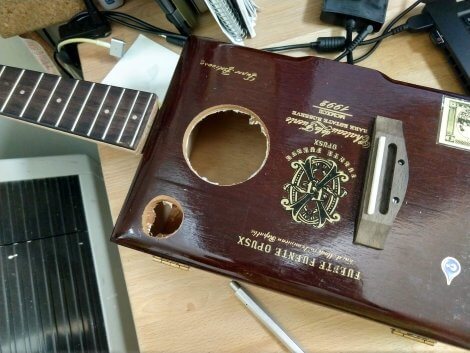
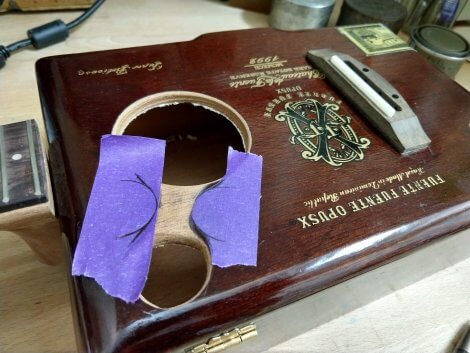
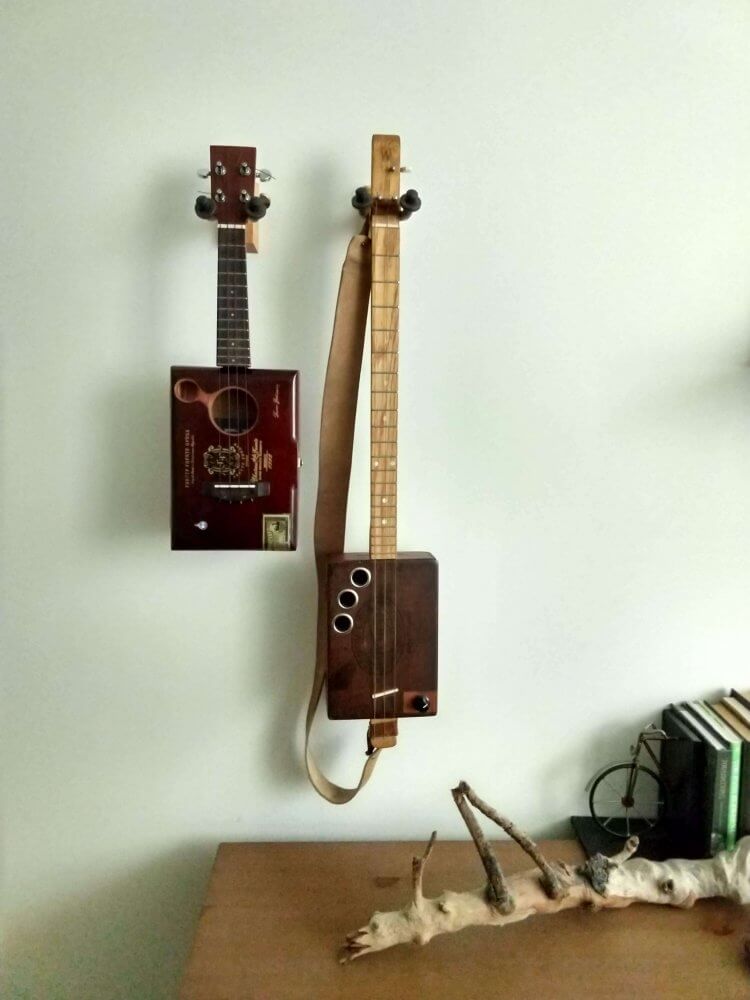
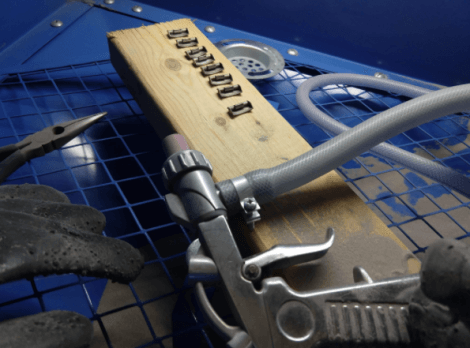
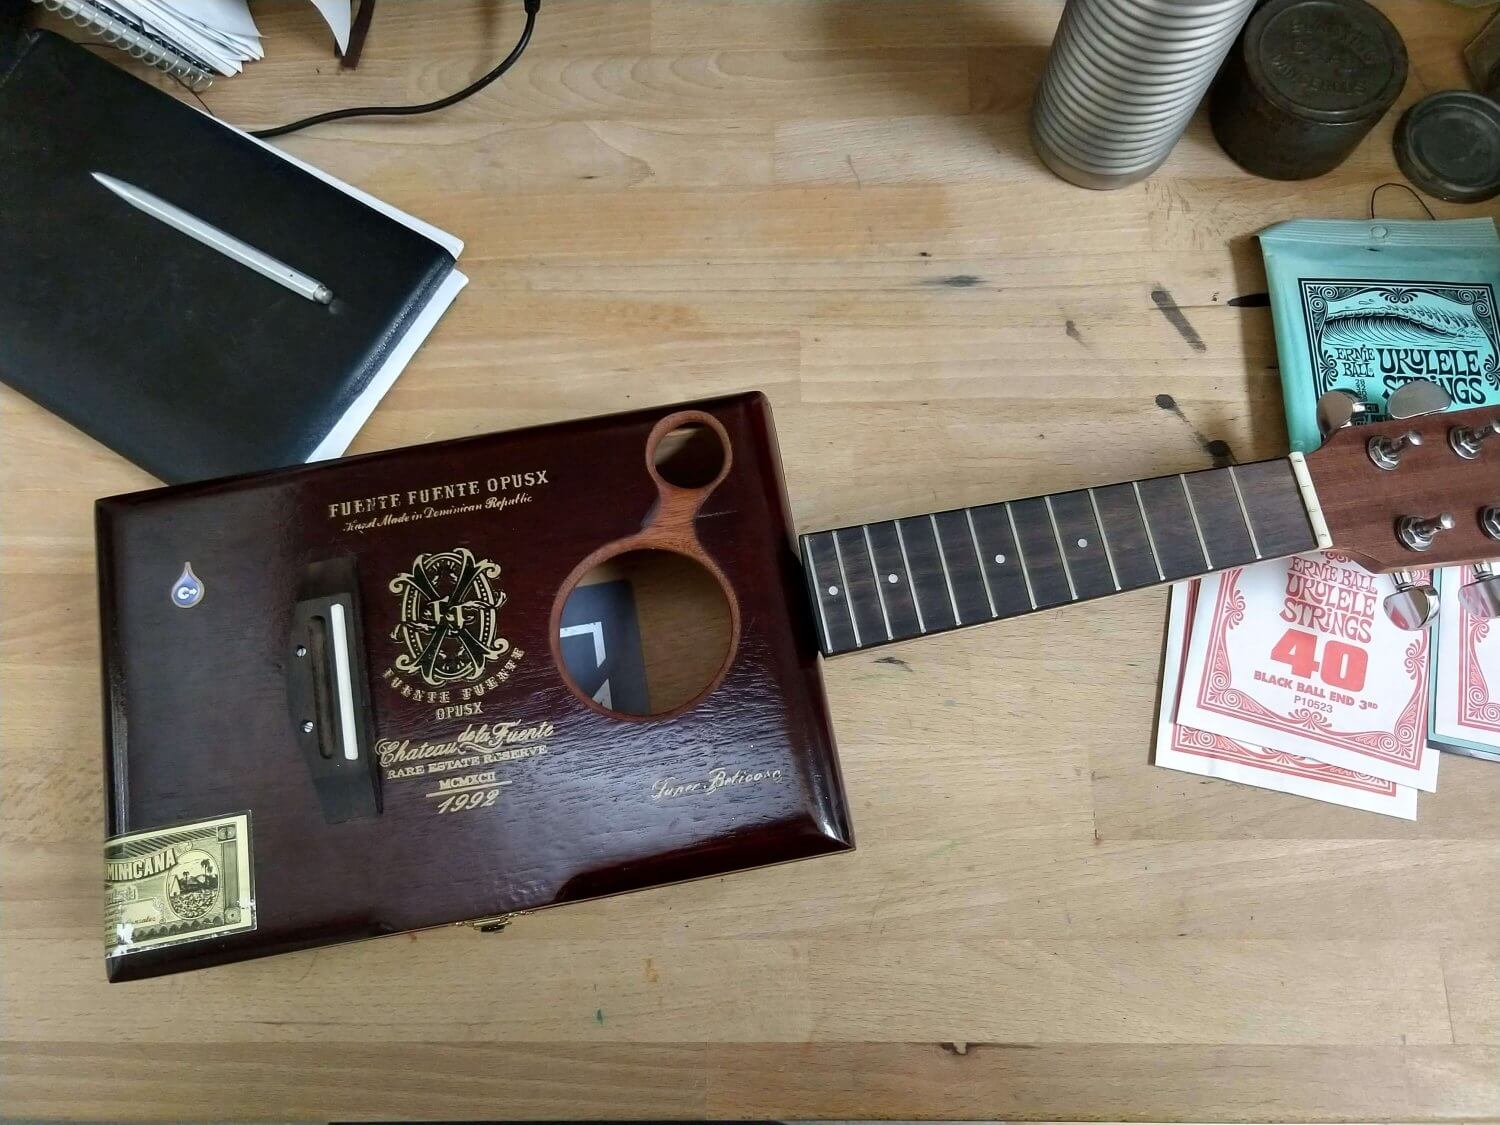
To finish the Fuente OpusX,  I chose some black string, and didn’t feel like fussing with tying knots on the bridge because I was eager to see if it would actually play and stay in tune! Next time I replace the strings, I’ll probably tie the knots though since the little beads aren’t great-looking.

Overall, I’m pleased with the ukulele and enjoy its mellow sound. Maybe as mellow as the smoke some cigar aficionados enjoy — just without the after-stench.

And instead, every once in a while I catch a woody musky gorgeous scent of cedar.

Cigar Box Ukulele and Guitar

Cigar Box Ukulele and Guitar

(I’m not sure exactly where I found this PDF, I can’ track down the original URL. But I found some helpful tips, and skipped bits I didn’t need in this build. I’ll leave it here in case you’re looking for more technical and legit instructions for making your own: How to Make a Cigar Box Ukulele by Steven Miller)


I hope you voted (if you’re in the U.S.). I did.

But I don’t care if you voted Trump or Biden or other.

I don’t care if you’re Republican or Democrat or neither.

What matters is we’re in this together and we all want a brighter future.

Better than yesterday. Bickering won’t get us there.

Watching the news won’t get you there.

Let’s all take a collective exhale.

Let’s vote for an epic today and an amazing tomorrow.

Not by what we say, but by what we do and how we live.

That was then. This is now. Uncertainty will pass when you focus on what is certain.

What is certain is you have a purpose to fulfill today.

Good work to do. A family to lead. Problems to solve. Wounds to heal.

Let’s go.


TL;DR:

  • A Secret Path to Your Heart
  • Simple U.S. Navy SEALs Breath Technique
  • What (Not) to Do When Flying Upside Down
  • Origin Story. HONNR -> VALOR -> SCOUT -> ENDUR -> COURG/2c

Continue reading


Transformation doesn’t just happen while we sleep. Everyday we must choose to grow.

We must start, but we can’t rush.

Science provides suggestions for how to install upgrades. Not everything works for everyone, but finding out what does work is the work.

TL;DR:

  • Wisdom kryptonite
  • Don’t be a drooling dog
  • How to enjoy food more (And improve cognitive and hormonal function if you’re interested in that kind of thing)
  • Try this time expanding experiment
  • Be stødig (Norwegian word of the week)
  • Savor Tooth Tiger
  • 5 Prototypes enroute

But if you want more, you can always keep reading. Continue reading


*BEWARE: CONSTRUCTION ZONE*

“Grit is the stubborn refusal to quit.” Anonymous

For those of you interested in the gory details, here’s a peek in the workshop and final recap of the ordeal that finally got us where we needed to go. Venture on only if you don’t mind some grit between your teeth, inhale some abrasive, and feel the motor oil splatter.

You’ll get a little taste of why I wanted to quit and just refund the money. Lord knows there wasn’t profit in this project. But I don’t like to quit. I’m pretty stubborn when I set my mind to something.

Are the end links perfect? Perfectly imperfect. That is, on some links you can still see some maker’s marks. But I think they add to the finish.

And as with titanium as you know from COURG, they’ll pick up their own patina over time as you rock it. In the end, I decided to leave my personal endlinks rougher than all yours to remind me of the grit and abrasive tenacity it took to see this small batch hand crafted project to completion.

Well, you know full well now that the 3D printer we used, who had promised to help us finish the links, failed and gave up. I chased down an expert polisher from Omega, and he was too scared to try.

I went back to the 3D printer and pushed him to try again. He did. He tried taking the endlinks to another company. Both failed.

I realized I would have to do it myself to figure out how to make it happen. After a some research, I learned that some gunsmiths had success using bullet shell polishing tumblers to finish titanium. So, I purchased a tumbler with much anticipation and poured in some abrasive.

Trial & Error & Error & Error & Victory

From what I read of gunsmiths’ experiences, some said their projects took days of tumbling. Keep in mind, these tumblers are just glorified vibrating bowls.

The thing was ridiculously loud and something came loose and it got even more obnoxious. I worried my neighbors would go out of their mind. I was going out of my mind.

Three days later: FAIL. It did absolutely nothing besides make noise.

Looking back, I don’t know what I was thinking pitting a vibrating bowl against titanium grade 5. Wonderwoman Grace would call it optimism bias.

I set up a DIY mini-grinding cabinet and set to work with my dremel and some flapper wheels. But, when grinding titanium grade 5, because the metal is so hard the grinding produces a lot of heat. So, you need some kind of coolant.

You can’t use water because although it cools somewhat, it wouldn’t lubricate the cutting surface enough to make a difference. And so, I had to use motor oil.

home-workshop

(Scout likes hanging out while I do messy things.)

I dipped the endlink into the motor oil and then applied the dremel flapper wheel. Amazingly, it worked and I was able to grind the nubbly 3D printer textures to a smoother surface.

(And yes, the little DIY cabinet is surprisingly effective because I added an extra sealant in the lid. So, no oil or abrasive dust escaped into the area where I work on watches!)

But still, that surface was not nearly the right match. I need to get matte and smooth.

Maybe the gunsmith vibrating bowl would work now? Nope. I needed a real sand blaster.

Easy-Peasy Sandblast

WRONG. One limiting factor is that I have no room in my workshop in the apartment (a small walk-in closet) for a compressor, so I bought a mini-blaster used for etching glass in the hopes that it could do the job. It was like I was spraying baby powder at the endlink.

With some experimentation, I found what worked fairly well was 220 grit sandpaper. But I couldn’t sand the endlinks like you might imagine, because then I would get a sort of brushed finish.

I found that pressing a fresh part of the sandpaper on the endlink, while rubbing the end of a metal rod against the back of the sandpaper yielded a sort of sandblasted matte finish.

I tried this on a few links and it took hours and my fingers were getting seriously cramped, and the finish was not uniform enough. There was no way I’d get through 30!

Next, I tried various makerspaces and I only found one with a solid industrial sandblasting setup. But they weren’t equipped to let me switch out the abrasive they had preloaded, so I just had to take a shot.

The grit turned out too coarse. I liked the look of it, but it just didn’t match the case and band.

bigger-blast

Time & Space

In the end, it took us going to Toronto and a week off from the day job to get them done because there’s no way I could have set this up in our apartment in Manhattan.

Living in a small apartment with two little children (and a very patient wife), and neighbors, it just wasn’t possible to get a large air compressor and real blast cabinet.

Blast Workshop

(That’s the final setup that made it happen! We’re now the proud owners of a bench grinder, a blast cabinet, heavy duty air compressor, and 40 lbs of proprietary abrasive mix!)

My plan was to hit the links again with a finer grit. Thankfully, I found a company called Spectrum Abrasives in Toronto specializing in supplying abrasives of all kinds. They’re a family owned business started by the dad, and now run by his two sons.

START OVER 

sandblast

Spectrum explained that I couldn’t reblast a blasted surface. A coarse grit blasted surface, can’t be blasted to an optimal finish with finer grit.

They recommended we use a special grinding wheel first to polish the surface lightly, and then hit the links with a blend of glass and aluminum oxide grit to match the band and case finish as close as possible.

A grandson of the founder, on the way to college in the fall, created the special abrasive blend for us. There’s just something special about a family business.grind